
Set up Mail forwarding in Outlook
Create an Outlook rule that forwards USCIS and EOIR emails to your ClerqLegal intake address, and every notice is read, matched, and calendared automatically.
Your firm’s ClerqLegal intake address is shared with you during onboarding and looks like yourfirm@intake.clerqlegal.com. Keep it handy for the steps below. If you do not have it, email support.
-
Open Outlook rules
In Outlook on the web or the new Outlook app, click the gear icon, then go to Mail › Rules and click Add rule.
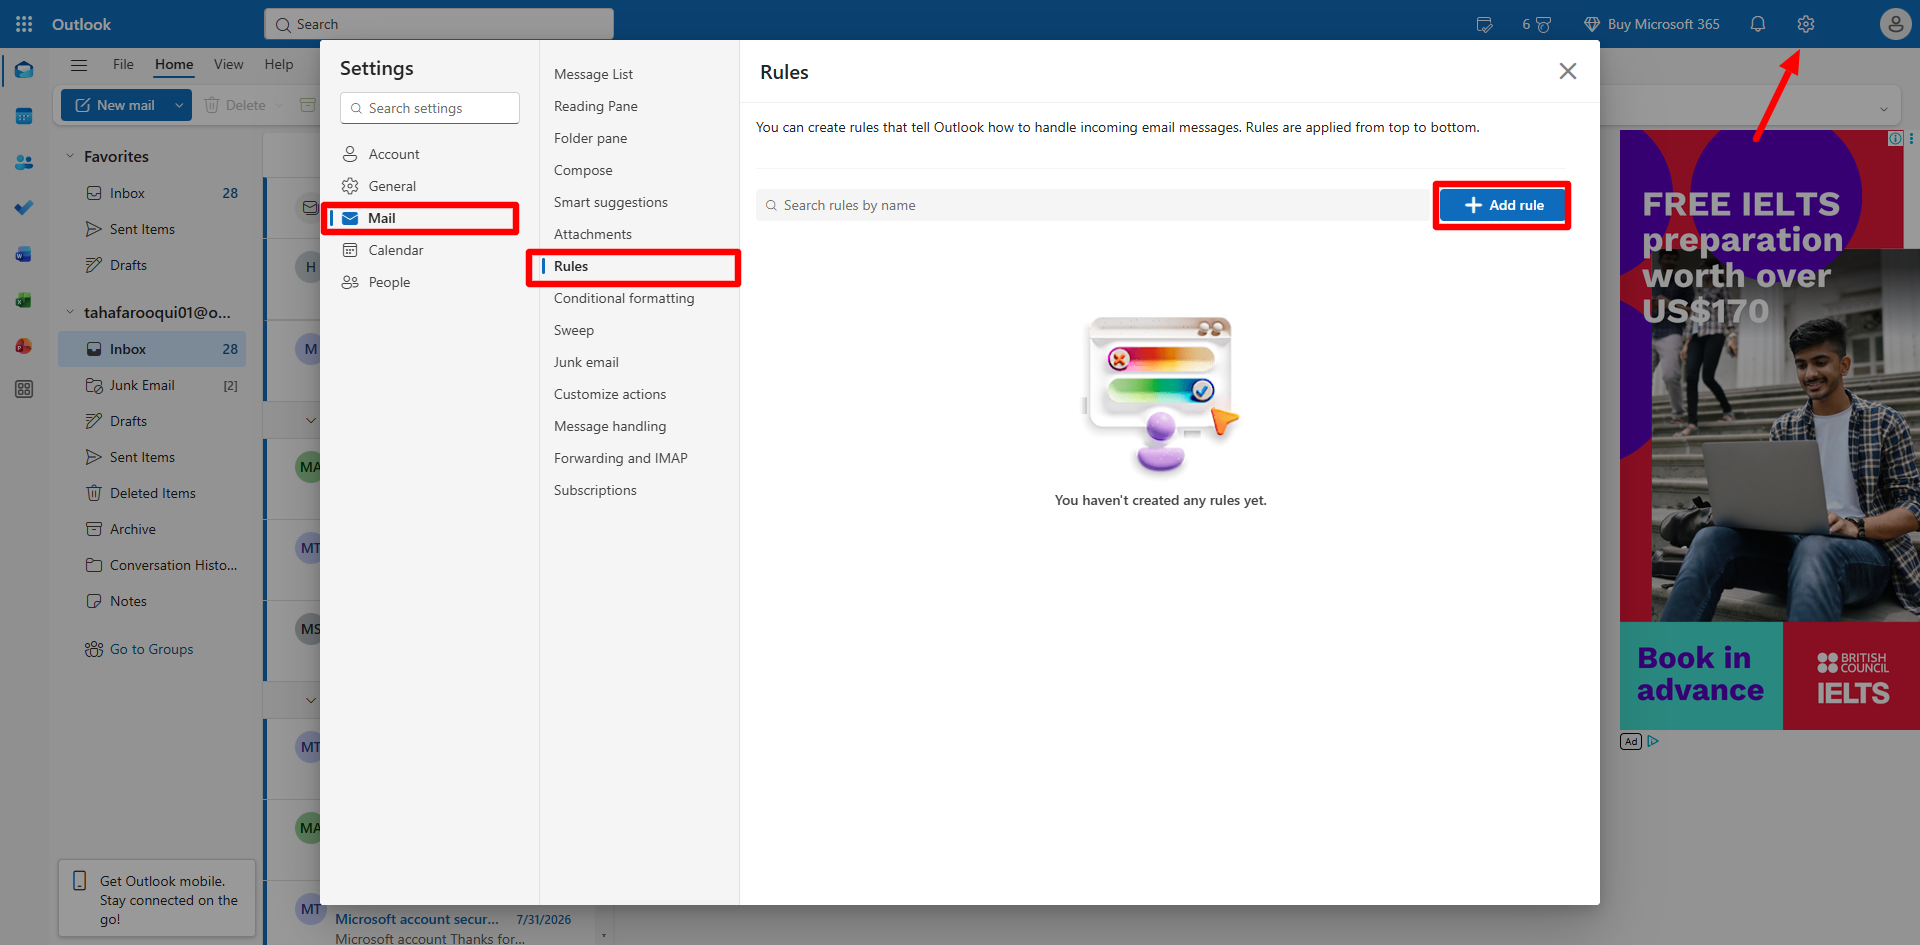
Outlook settings: Mail › Rules › Add rule. -
Name the rule and set the condition
Name the rule, for example Forward notices to ClerqLegal. Under Add a condition choose From and enter the sender addresses or domains you want forwarded.
- USCIS: uscis.dhs.gov
- EOIR: usdoj.gov
- To match a whole domain, use the condition Sender address includes instead of From.
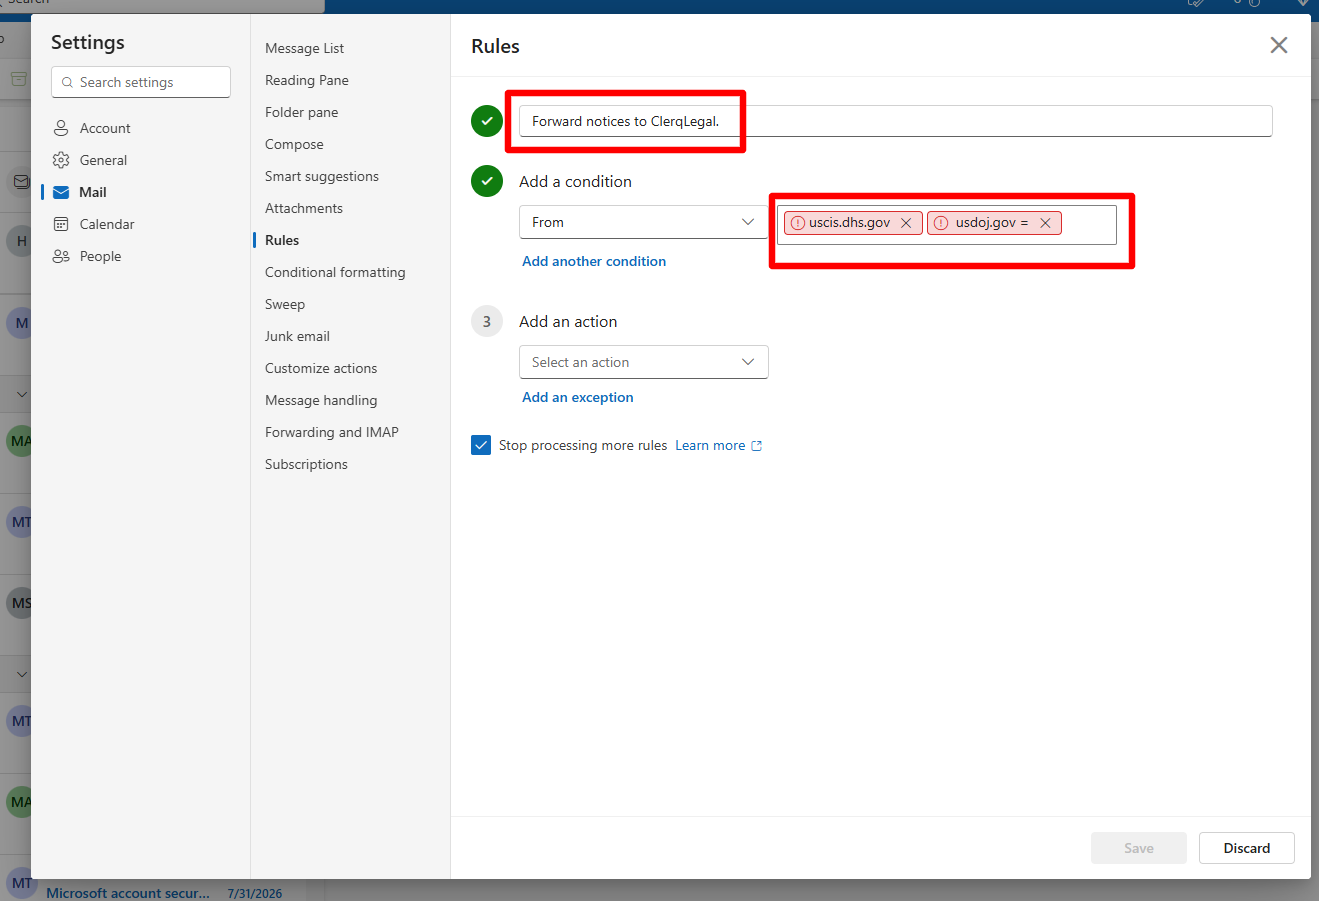
New rule with the From condition set to notice senders. -
Forward to the intake address
Under Add an action choose Forward to and paste your ClerqLegal intake address. Stop processing more rules can stay ticked. Click Save.
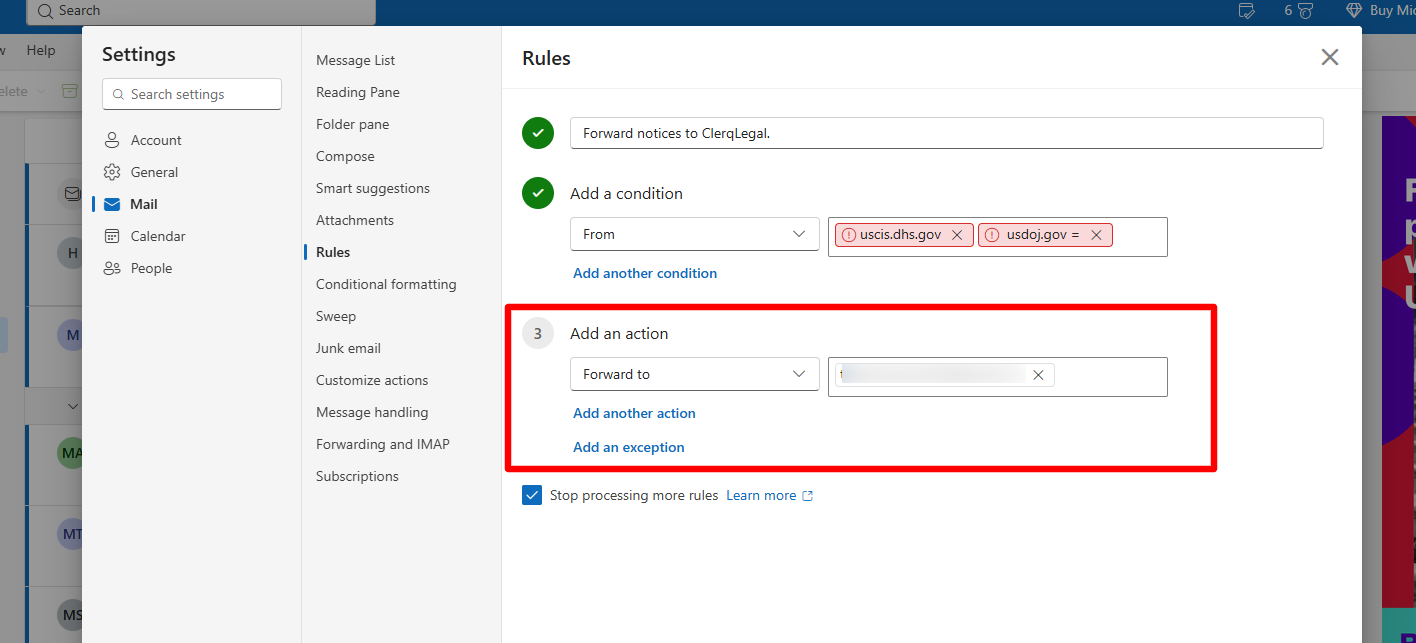
Rule action Forward to with the intake address entered.
Microsoft 365 admins: allow external forwarding
Many Microsoft 365 tenants block automatic forwarding to outside addresses by default. If forwarded messages never arrive, ask your Microsoft 365 administrator to allow automatic forwarding for your mailbox in the Anti-spam outbound policy in Microsoft Defender, or to add a remote domain for intake.clerqlegal.com with forwarding enabled.
Forward paper mail too
For notices that arrive by post, scan them and email the PDF to the same intake address, or set your scanner’s scan-to-email destination to it. Each attachment is treated as a separate notice.
 Gmail forwarding
 Connect USCIS
 Manage calendar rules
 Dropbox