
Manage Calendar Rules
Set your firm's timezone and the rules ClerqLegal's AI uses to block time on your calendar for appointments and hearings.
-
Open the Calendar Settings tab
In the left sidebar under Administration, open Admin Settings, then select the Calendar Settings tab.
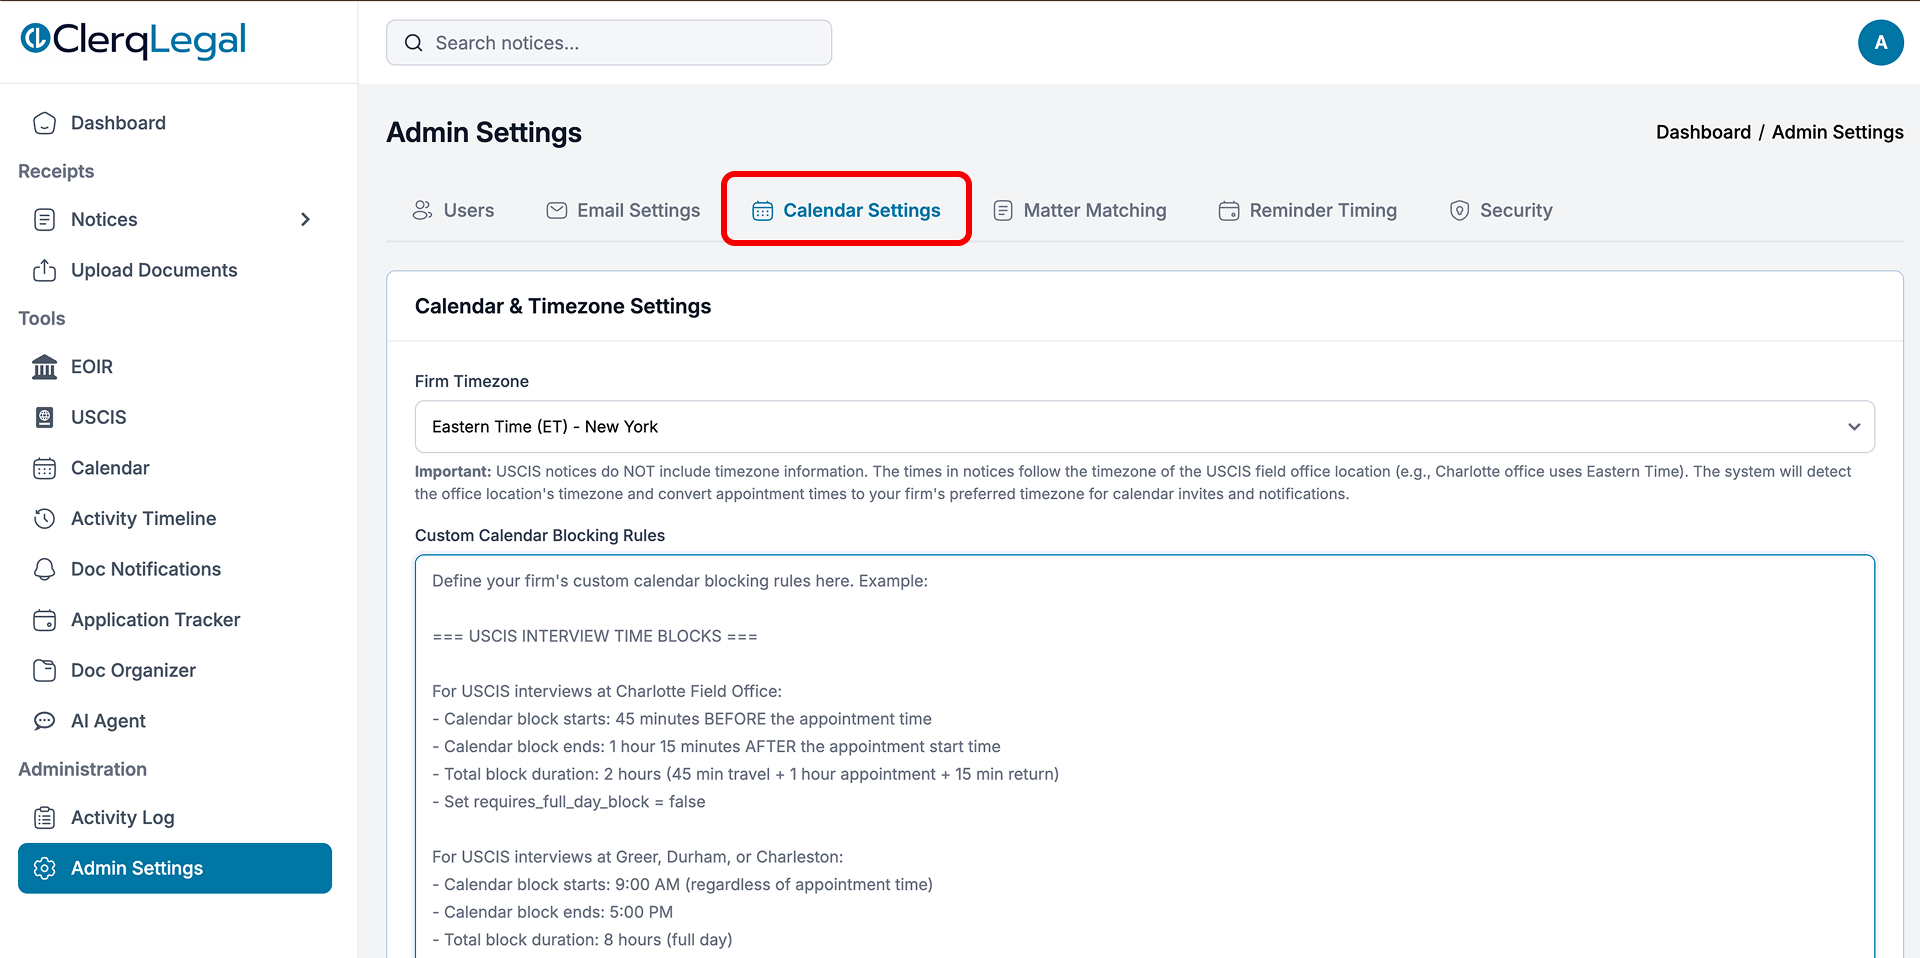
Admin Settings → Calendar Settings: Firm Timezone and Custom Calendar Blocking Rules. -
Set your firm timezone
Choose your firm's timezone from the Firm Timezone dropdown (e.g. Eastern Time (ET) – New York).
Why this matters
USCIS notices do not include timezone information. Times follow the USCIS field office's local timezone. ClerqLegal detects the office location's timezone and converts appointment times to your firm's preferred timezone for calendar invites and notifications.
-
Define your calendar blocking rules
In the Custom Calendar Blocking Rules box, describe how time should be blocked for each appointment type, location, and travel requirement. The AI reads these rules to calculate the right calendar block for every appointment. For example, USCIS interview time blocks, Master/Individual hearing blocks, and location-based full-day blocks for out-of-area offices.
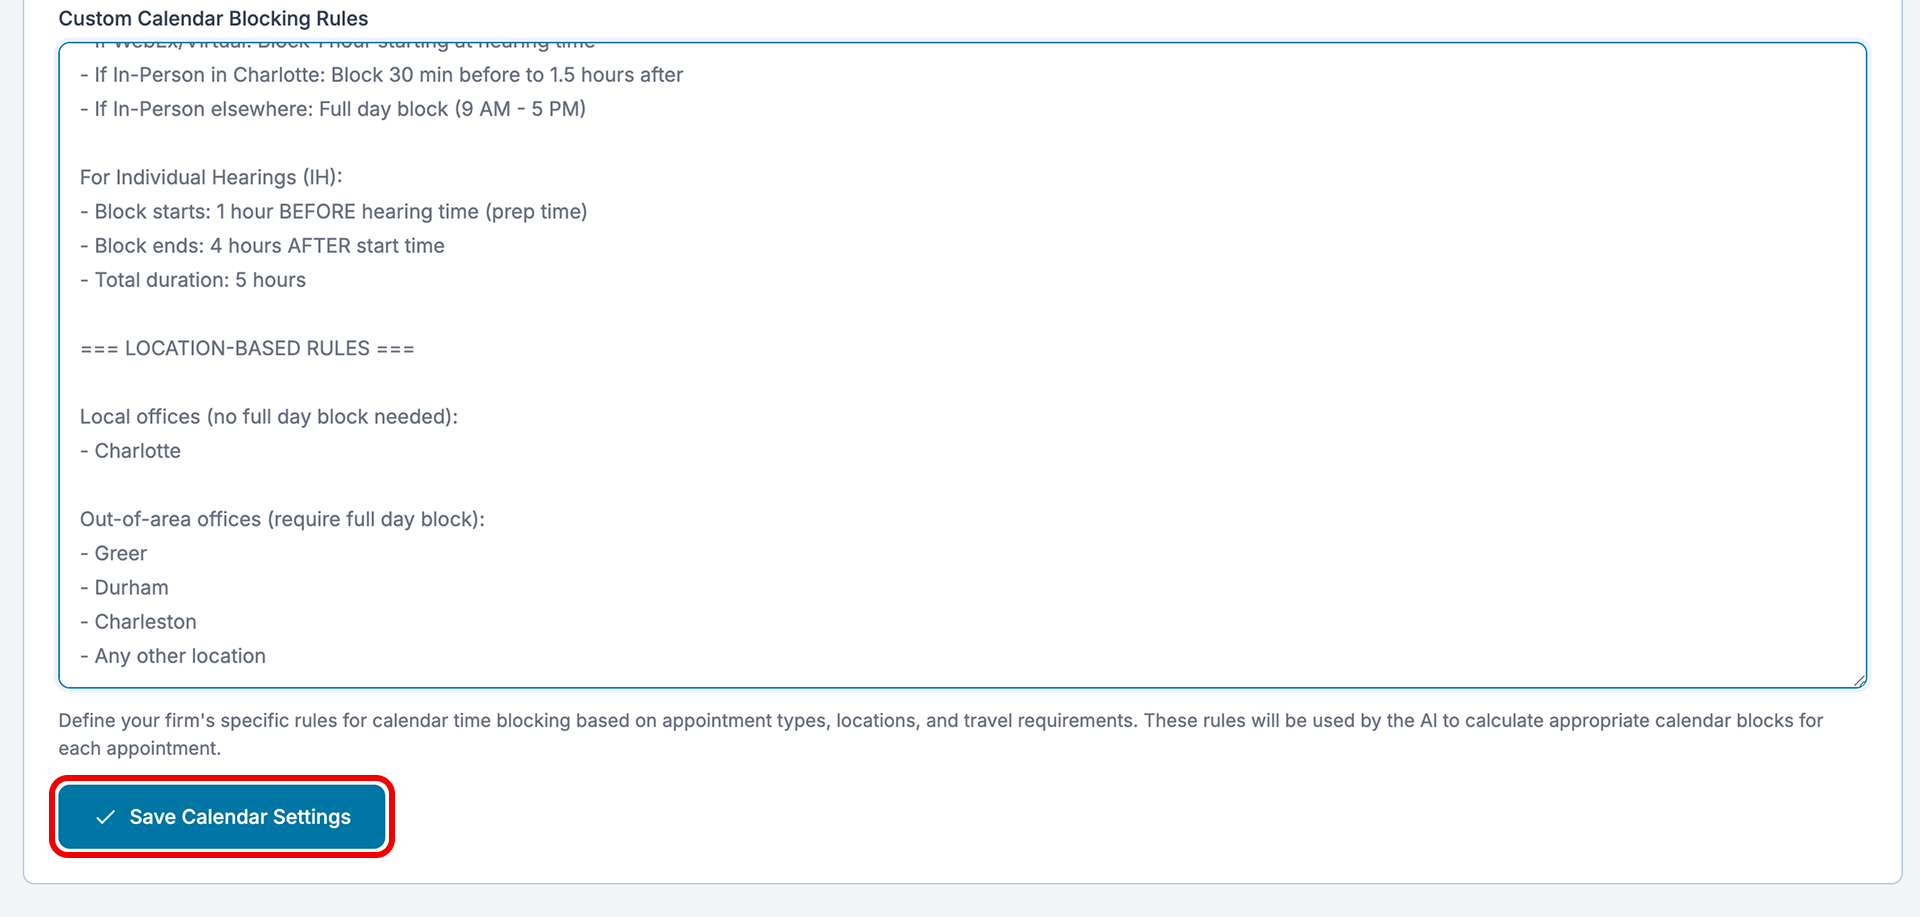
Custom Calendar Blocking Rules: free-text rules the AI uses to size each block. -
Save your changes
Click Save Calendar Settings to apply your timezone and blocking rules.
Tip: be specific in your rules
Spell out start/end offsets and durations (e.g. "block starts 45 min before, ends 1h15 after"), and which offices need a full-day block. The clearer the rules, the more accurately the AI sizes each calendar block.
 Google Drive
 OneDrive
 Edit email templates