
Set up Mail forwarding in Gmail
Create a Gmail filter that forwards USCIS and EOIR emails to your ClerqLegal intake address, and every notice is read, matched, and calendared automatically.
Your firm’s ClerqLegal intake address is shared with you during onboarding and looks like yourfirm@intake.clerqlegal.com. Keep it handy for the steps below. If you do not have it, email support.
-
Open Gmail settings
In Gmail, click the gear icon in the top right, then choose See all settings.

Gmail: click the gear icon, then See all settings. -
Add the intake address
Open the Forwarding and POP/IMAP tab and click Add a forwarding address. Paste your ClerqLegal intake address, then click Next › Proceed › OK. Gmail sends a confirmation email to that address.
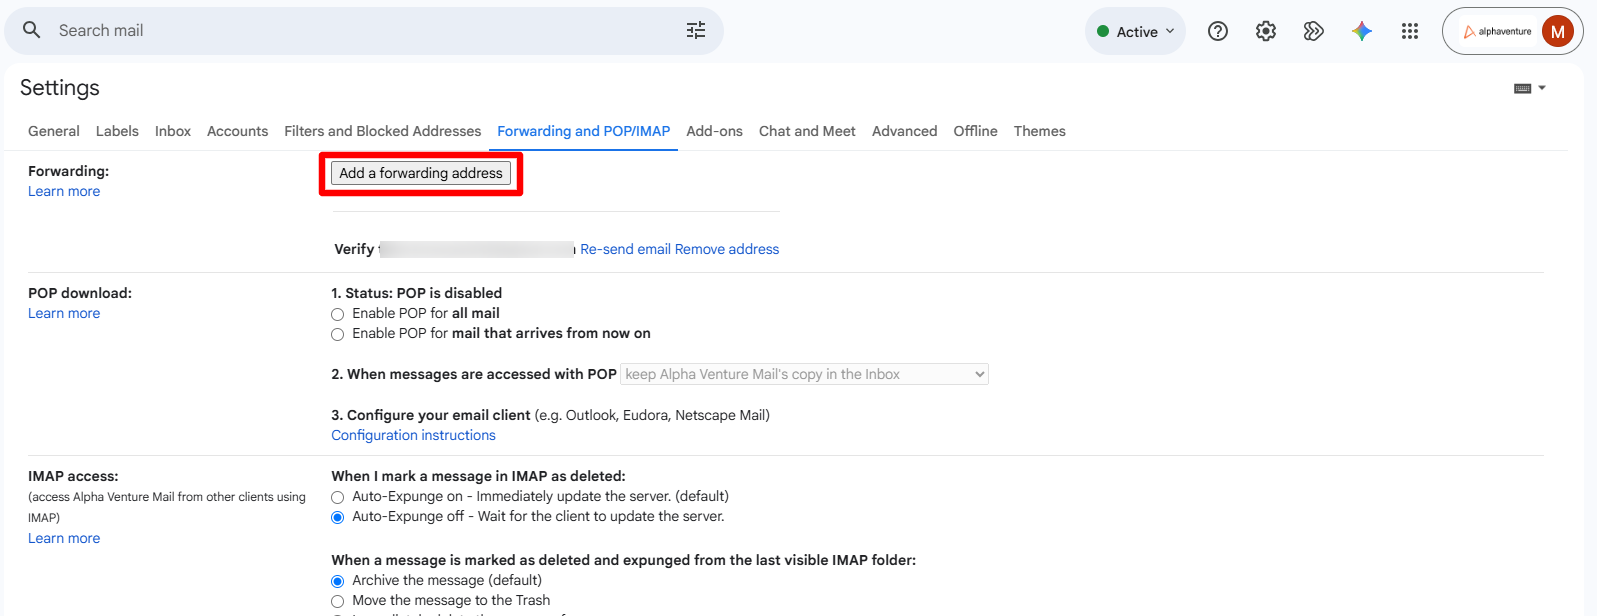
Forwarding and POP/IMAP tab: Add a forwarding address with the intake address entered. -
Confirm the address
ClerqLegal receives the confirmation email on your behalf and approves it. Your ClerqLegal contact will let you know once it is confirmed, usually within one business day. Back on the Forwarding tab, leave Disable forwarding selected so that only the filter you create next forwards mail, not your entire inbox.
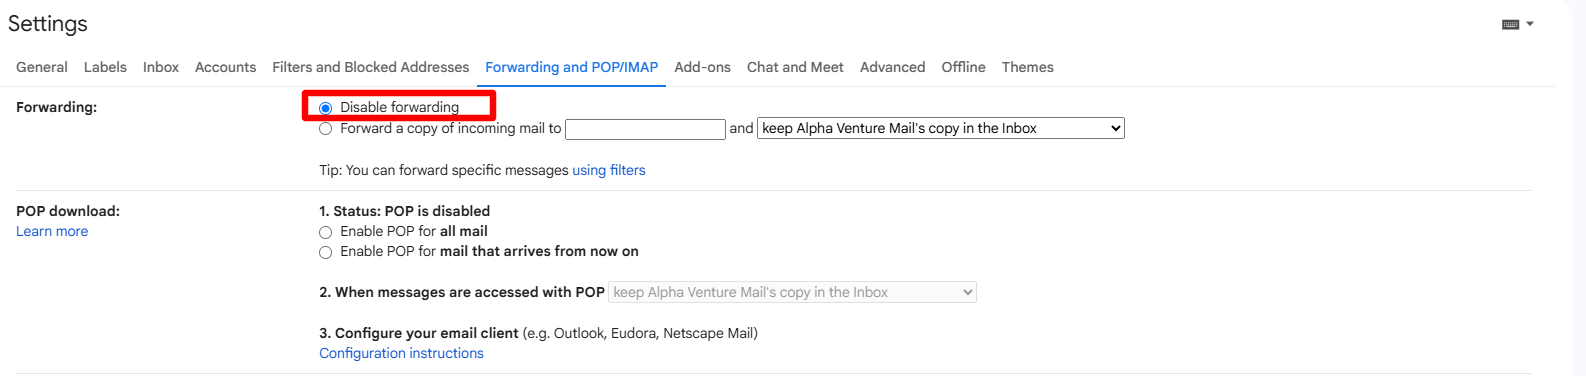
Forwarding tab showing the verified intake address with Disable forwarding selected. -
Create a filter for notice emails
In the Gmail search bar, click the Show search options icon. In the From field enter the sender domains you want forwarded, then click Create filter.
- USCIS: uscis.dhs.gov
- EOIR: usdoj.gov
- Separate several senders with OR, for example uscis.dhs.gov OR usdoj.gov.
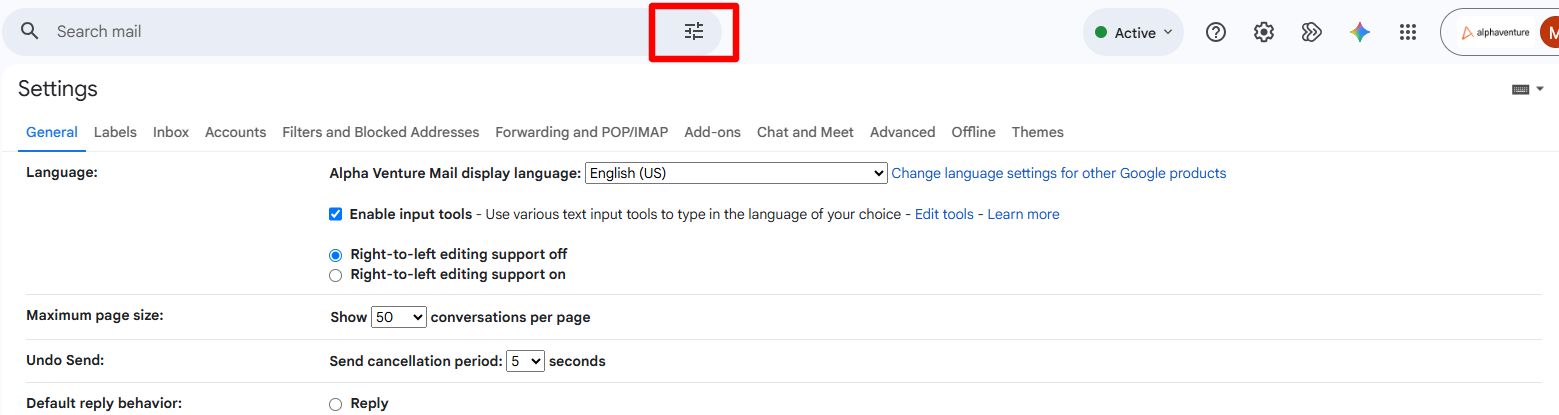
Click Show search options in the Gmail search bar. 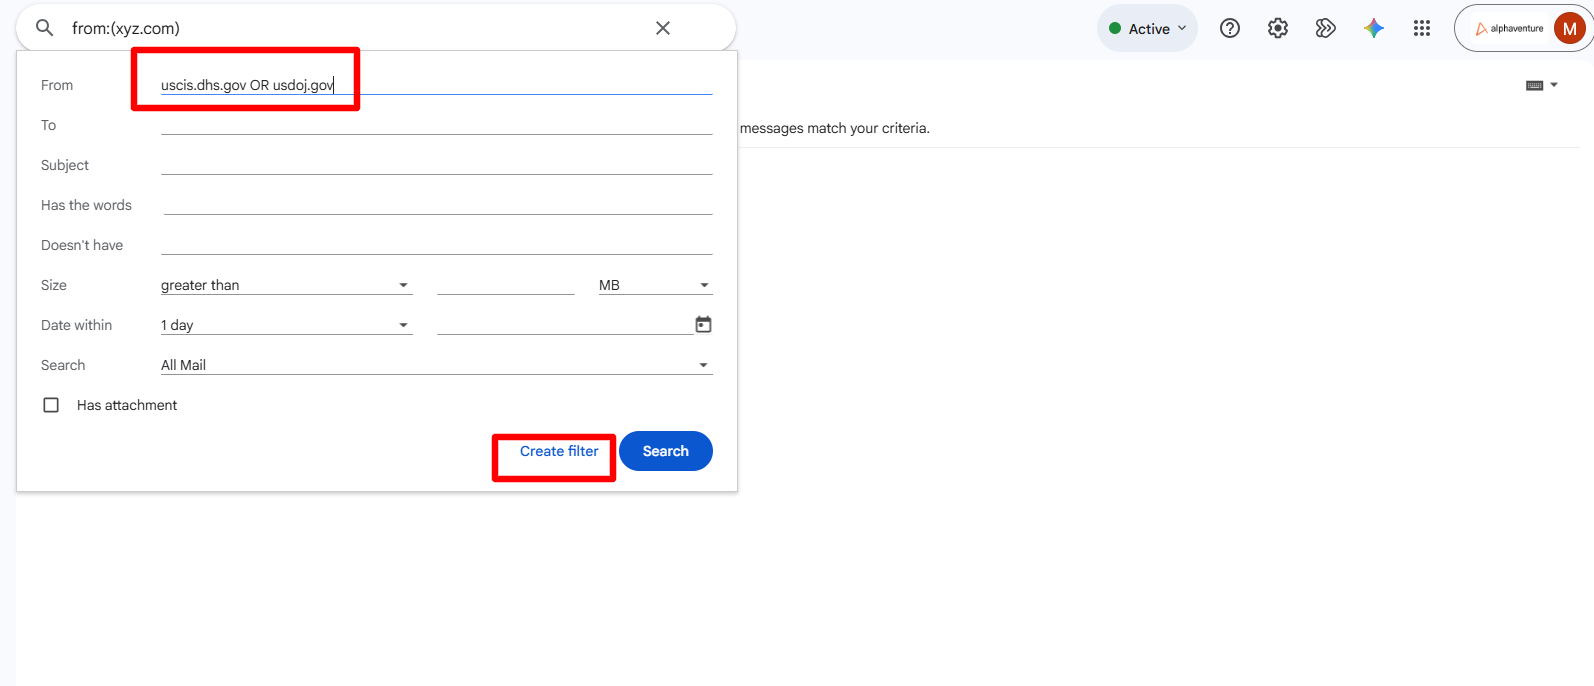
Enter the sender domains in the From field, then click Create filter. -
Forward matching mail to ClerqLegal
Tick Forward it to and choose your intake address from the dropdown, then click Create filter. Gmail keeps the original in your inbox and sends a copy to ClerqLegal.
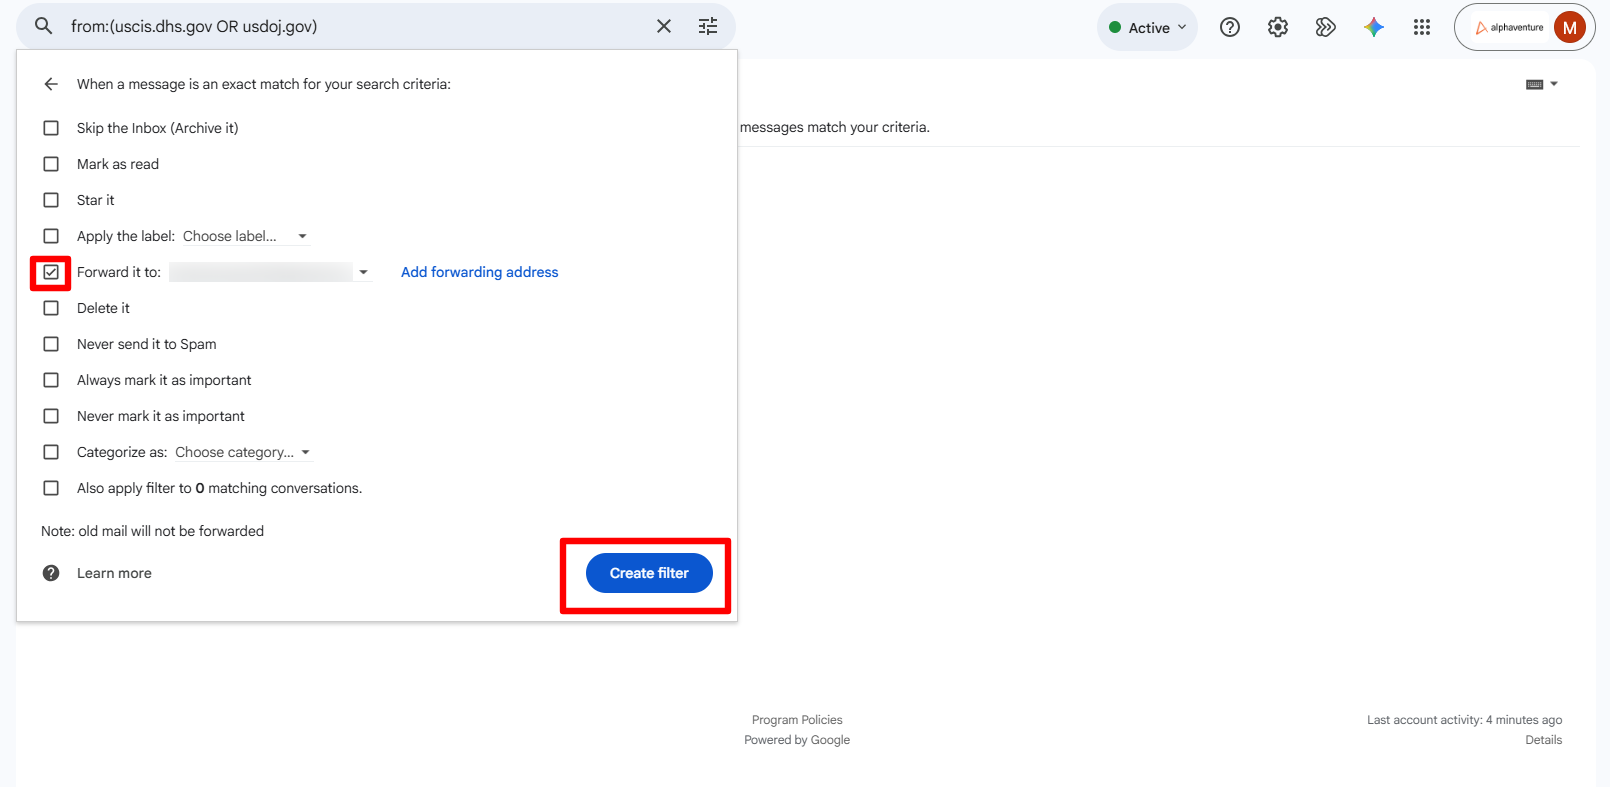
Filter actions with Forward it to set to the intake address.
Forward paper mail too
For notices that arrive by post, scan them and email the PDF to the same intake address, or set your scanner’s scan-to-email destination to it. Each attachment is treated as a separate notice.
 Outlook forwarding
 Connect USCIS
 Manage calendar rules
 Dropbox